


By Jaidyn Steinbrecher
Finally, students are free from the trenches of Presence! But it’s not all good news, as many students and clubs have found difficulties in the new and improved MyNest.
Today you will learn all that you need to know about MyNest from a Club and Organization perspective. From registering your club to getting familiar with the dashboard, welcome to your MyNest guide.
- Registering Your Club
First off, how do you make a club or organization on MyNest? Starting at the landing page, you will want to click on the little arrow at the top where it says “Groups” and then press the big blue button that says, “All Groups.”
Once there you will see at the very top it says, “Register New Student Organization.” I highly recommend you do this with a representative in the Office of Leadership and Engagement (OLE) so they can help answer any questions you may have.
First, you can type out your group name and group acronym, which are both required. There are various requirements, each having a little red asterisk next to them.
You will next have to select at least one category that represents you (Greek Life, academic club, etc.), as well as a logo. After that, there are two large boxes where you can add your mission statement and goals. Finally in this section, and most importantly of all, your constitution, which is required by all clubs and organizations on campus.
Next you will have to select at least two people for your officers, those being the president and treasurer. These, besides the advisor and secretary, are the only positions required for all clubs. You can add up to three more officers during this step, however you can add more later.
Now that you have done all that, you can press “Next,” and you will be met with two last questions. The only required one is that you have a selected advisor for your club or organization. You can also type in the box whether you plan to host any events in the coming semester.
Finally, you can press either “Save Form as Draft” and come back to it later, or press “Submit Form for Approval” to get it approved by the OLE.
This should only take a few business days, but it will only be done once you have gone through the Student Government Association (SGA) approval process, which you will have to reach out to the Parliamentarian, Olivia Ormsby (ormsby@susqu.edu), to set up and present to the SGA Senate.
- MyNest for Clubs and Organizations
Once your club is made and you are officially added as an executive member, you should be able to edit anything under your organization’s Dashboard.
The Dashboard is the main area you will be working in, and there are five main sections:
Activity:
The majority of your information will be found and placed under the “Activity” tab of the Dashboard. This is where you will find links to all the other four tabs, as well as everything from your club’s emails and forms to your money and statistics.
Each tab is mostly self-explanatory just by the title, but there are also little descriptions that give a preview as to what each section is used for. There are some sections that may not be relevant to all clubs, and there may still be some kinks to work out with the ones that you do end up using.
If you have any questions or issues with the tabs, be sure to go over to OLE and ask for help!
Settings:
The Settings section might just be the most overwhelming aspect of them all, with so many different tabs and options, but there are only a few you really need to pay attention to.
The “Basics” tab is the main and most important one, and truthfully the only one you really need to fill out at all. The first four options are only able to be changed by OLE workers, those being: Group Name, Group Type, Categories and Group Acronym.
Everything else is up to your choice! Here, you can add your logo and group photo, as well as share your mission statement and goals. But what makes this part so important is that this is where you upload your constitution and make your club available to other viewers on MyNest.
These are both at the bottom, so make sure to scroll down and read through the four Basic Settings so you can determine who can see and join your club on MyNest.
You can also find more in-depth settings under the “Access & Privacy” and “Membership” tabs at the top of the page.
The rest of the tabs at the top of the page aren’t too important, but you can feel free to look around and change what you want to.
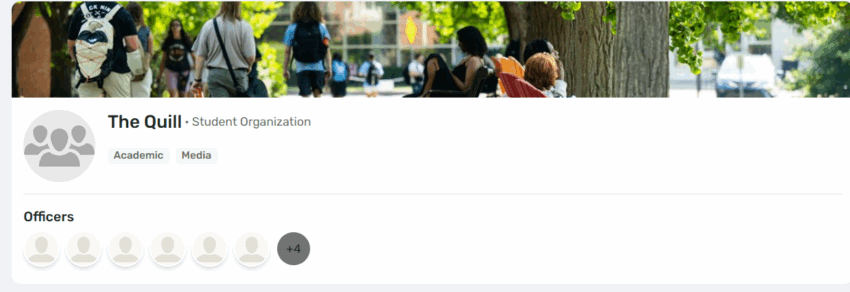
Officers:
Next up is Officers. Here is where you can find your existing officers and either add or remove them. It is quite self-explanatory but, as always, any questions can be directed at the OLE.
Group Page:
The Group Page is the only page that all people who are not executive board members will see. Acting as a sort of preview for what you did in the settings.
Reports:
Finally, there are five different things you will find under the “Reports” tab: Events Attendance, Members Attendance, Members Attendance Report Summary, Events Report and number of members you have in common with other groups.
Essentially this is a statistics tab, but I will say from personal experience that it is not the best currently, and most clubs use an outside spreadsheet to more accurately keep track of this information.
- Important Tabs on the Dashboard
Next, I will be going over the five arguably most important tabs on the Dashboard:
Adding Members and Officers:
To add members, you first click on the “Members” tab and then click on the blue button on the far right that says, “Add Members.” You will then type in the name of the member(s) you would like to add, and a pop-up should appear with their name.
If you want to notify the member(s), you can select the check box below and it will be sent once you finish. You can then press “Add” and all the people you just added should appear.
The process for adding officers is the same. Simply go to the “Officers” tab and repeat the steps. If the officer is already a member of the organization, you can also go to the “Members” tab and select the “Officer” checkbox in the bottom right corner.
Sending Mass Emails:
Once you have added all your club members, sending emails is much simpler. To start, go to the “Emails” tab and select “Compose Email” in the top right corner. Then you can select all those who you want to email, members, executive members, staff or all.
You can then choose one of the two options, either Email Composer or Email Builder. For the sake of simplicity, I will be discussing Email Composer, but if you want more creative freedom, feel free to try out the Email Builder option.
You can first review the participants who you are sending the email to, and you can select or deselect them. You can then choose who you want the email to be sent from, but it does have to be from an Officer.
After that you can choose a template to make your emails more visually appealing, and finally you have a box to type out the subject and main body of the email.
After you have crafted your lovely email, you have four options at the bottom: send myself a test email, preview it first, save as draft and save and send.
Adding Events:
Under the “Events” tab you can sort out all your upcoming and past events. To create a new event, you will click the top right corner where it says, “Create Event.” You will be met with various options and steps that can be overwhelming, so just take it one step at a time!
The first step is the “what,” where you can give your event a name, description and type. Then there is a spot called “Organizing Team” which is where you can add the event coordinator, host and other involved parties.
Up next you select the “when” and “where” which are self-explanatory but just remember that you must separately book the space on Event Management Services, which can be found via MyNest > Event Resources > Reserve Event Location or University Vehicle by Event Management Services (EMS).
If the meeting is virtual, you can also add the meeting link under “Meeting.” You can also add a photo or flyer. Under “More” you can add food information, but once again, you will have to register that under Event Management Services.
The next two options are about access to the events. You can select who can view them on MyNest, as well as who can register for them and how under “Access & Display Options” and “Registration Options.”
Finally, are your “Advanced Options” where you will find pretty much everything else that was not in the rest of the registration process.
After you have done all that, you can either save it as a draft or proceed to the approval form. It is important to note that you must approve the event as an organization before it is sent to OLE to be approved officially.
Creating Surveys and Forms:
The “Surveys and Forms” are very similar to any other form making platform, so I won’t discuss them too much in detail. What I will discuss, however, is the “Elections” option.
In the spring, OLE wants all clubs and organizations to be doing all their elections exclusively through MyNest. Creating elections is very similar to making other forms though, so feel free to play around with it.
Looking at Money:
Finally, what you really want to know about; money!
As of right now, this feature is still mainly in development, and all accounts will appear empty. But once this does become available, only the treasurer and OLE workers will be able to edit this section.
When you click the “Money” tab, you will, eventually, be able to see all funding that is added and taken out of the account. You can also generate a report at any time by clicking “Generate Report” on the top right corner.
If you have any current questions or concerns about your club’s balance, reach out to OLE and/or SGA’s Executive Treasurer, Kagan Watkins (watkinskr@susqu.edu).
- The Happenings Newsletter
The Happenings Newsletter, formerly Happenings at SU, is a weekly newsletter that is sent out from the Hawk Hub and OLE each week, highlighting all the events on campus including club and organization meetings, events, fundraisers, performances, etc.!
Unfortunately, because of this new MyNest and switch with Campus Groups, there are other more important bugs and issues to work out before the newsletter is fully active once again. In the meantime, a less in-depth Happenings Newsletter will be sent out weekly to keep students in the loop. But how can your club be featured?
Happenings will be sent out at the end of each week, either on Friday or Saturday. To ensure that you are featured on it, you must make sure that all your information is posted on your Group Page. Any meetings, events, fundraisers, etc., must be uploaded and visible by the night prior to the newsletter’s send out.
Once the Happenings Newsletter is in full swing again, an email will be sent out to all club presidents and organization leaders to let them know about it at least four days in advance.
5. Conclusion
As returning students have learned several times over the past few years, new MyNest iterations are a yearly struggle but hopefully, this is the last biggest evolution of it, and we can all learn to grow alongside it.
For any further information, comments, questions or concerns, make sure to visit the Office of Leadership and Engagement to receive help!